
Whilst the Coronavirus lockdown continues, we have asked our Conservator for some bookbinding activities you can try at home. This is the first of three blogs in which she will show you how to do some book-binding at home…
—
A part of my job that I always look forward to is running bookbinding sessions. Regardless of someone’s skill set, all participants leave the session with their own excellent example of a binding, and there is something very rewarding in creating an object with your own hands. Whilst staying at home, many of us are trying new activities, so we have attached to this blog instructions for the three bindings I usually teach.
For the lessons I run at DHC, we provide participants with the required bookbinding material, but if you don’t have your own book-cloth or mull, which I’m sure many of us don’t, I’ve suggested some alternatives that I hope you might have available around the house.
Have fun!
—
Japanese stab-stitch binding
What you’ll need:
- 5 to 10 sheets of plain paper
- 2 sheets of patterned paper
- Scissors, or scalpel, ruler and cutting mat
- Ruler and pencil
- Bulldog clip or paperclips
- Something to puncture holes in the paper eg an awl or needle
- Thread (5 x the width of the paper) and needle
Instructions:
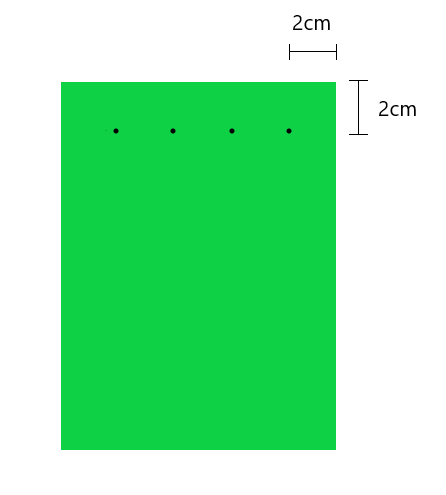
- Cut all your pieces of paper, including the covering material to the same size (ours is 10 x 15cm).
- On one of the cover sheets, measure out your puncture holes. (These instructions are for a four-hole binding, but once you’re confident with the technique, you can use many holes to create different patterns.) Using a pencil, mark four holes along a short edge, 2cm in from the edge of the paper and 2cm apart from each other.
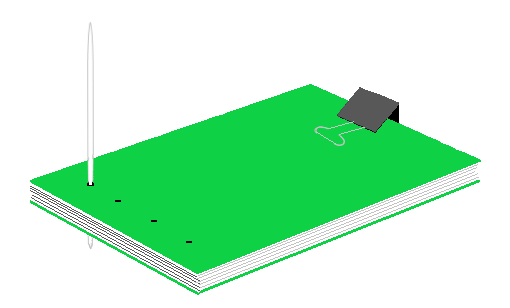
- Use a bulldog clip or paperclips to secure all the sheets together with the covers on the outside. Using an awl or needle, pierce the paper at the pre-marked holes, being careful that the paper doesn’t mis-align. If you have a piece of stiff foam, or similar, to place under the paper whilst puncturing the holes, this can sometimes help.
- Thread your needle and sew the paper together using the following method (the dash lines indicate the thread is on the other side of the binding):
1. Start at hole B, push your needle and thread through, leaving a couple of inches of thread to tie a knot with at the end. Wrap around the spine and insert your needle back through hole B, being careful not to puncture the thread already in the hole. Pull the thread snug.
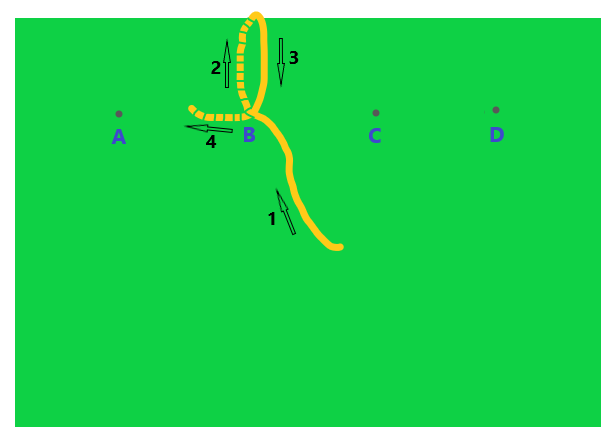
2. Next, insert your needle through hole A (from the back of the binding). Again, wrap the thread around the spine and go back through hole A, pulling the thread snug as you go.
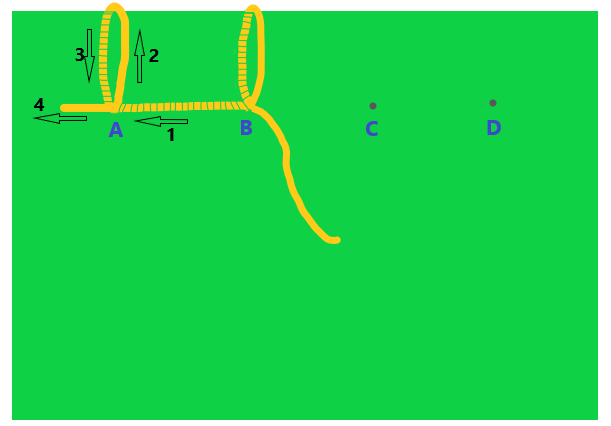
3. Now wrap the thread around the edge of the paper, parallel to the spine, and go back through hole A.

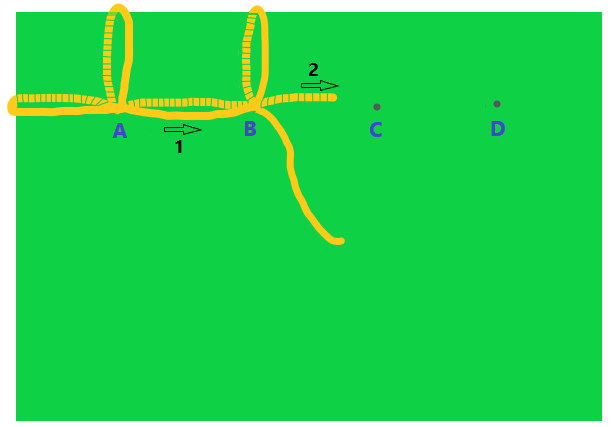
4. Take the needle back through hole B, still being careful not to puncture the thread, and pulling snugly as you go.
5. Insert the needle through hole C, wrap around the spine, and go back through hole C.
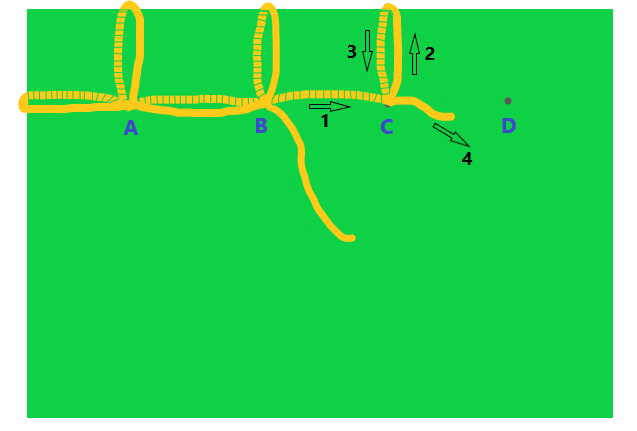
6. Insert needle into hole D, wrap around spine and go back through hole D.
7. Wrap the thread around the edge of the paper, parallel to the spine, and again go through hole D.
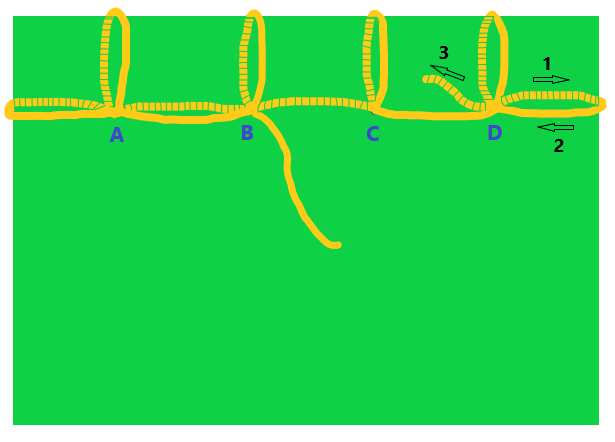
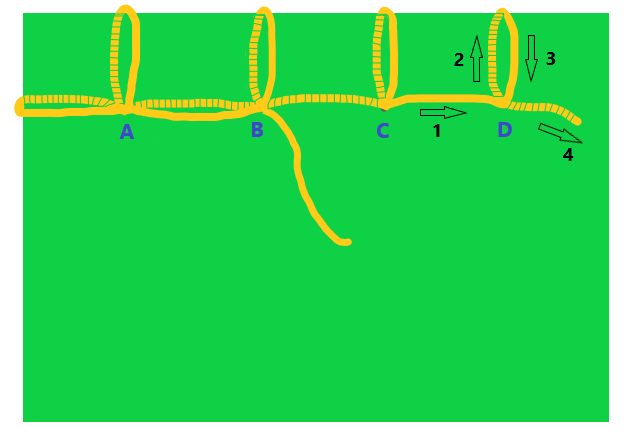
8. Insert needle back into hole C. The thread should be pulled snuggly. Tie the two ends together in a knot positioned over a hole and cut off the ends.
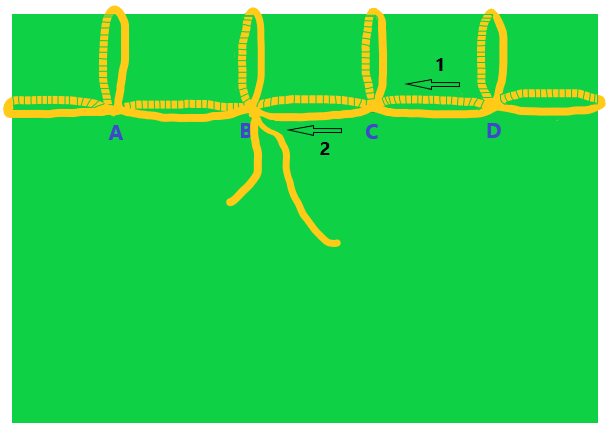
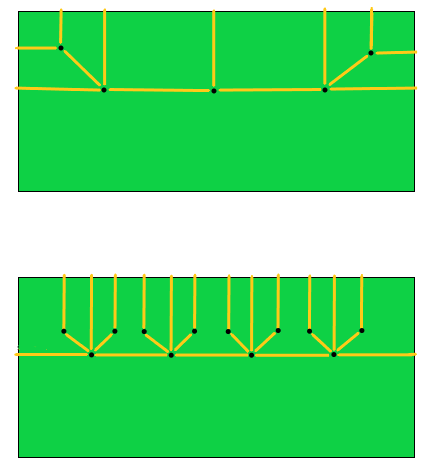
- Other patterns can be made – these are a couple of examples of traditional ones, but you could make your own designs. The technique is the same – if you weave from each hole to the next along the width of the binding and then back again, all the holes should end up with thread between them on the front and back. If you puncture larger holes, ribbon could be used instead of thread.
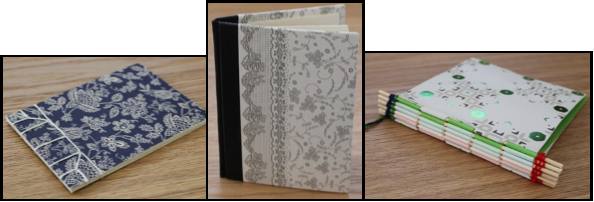
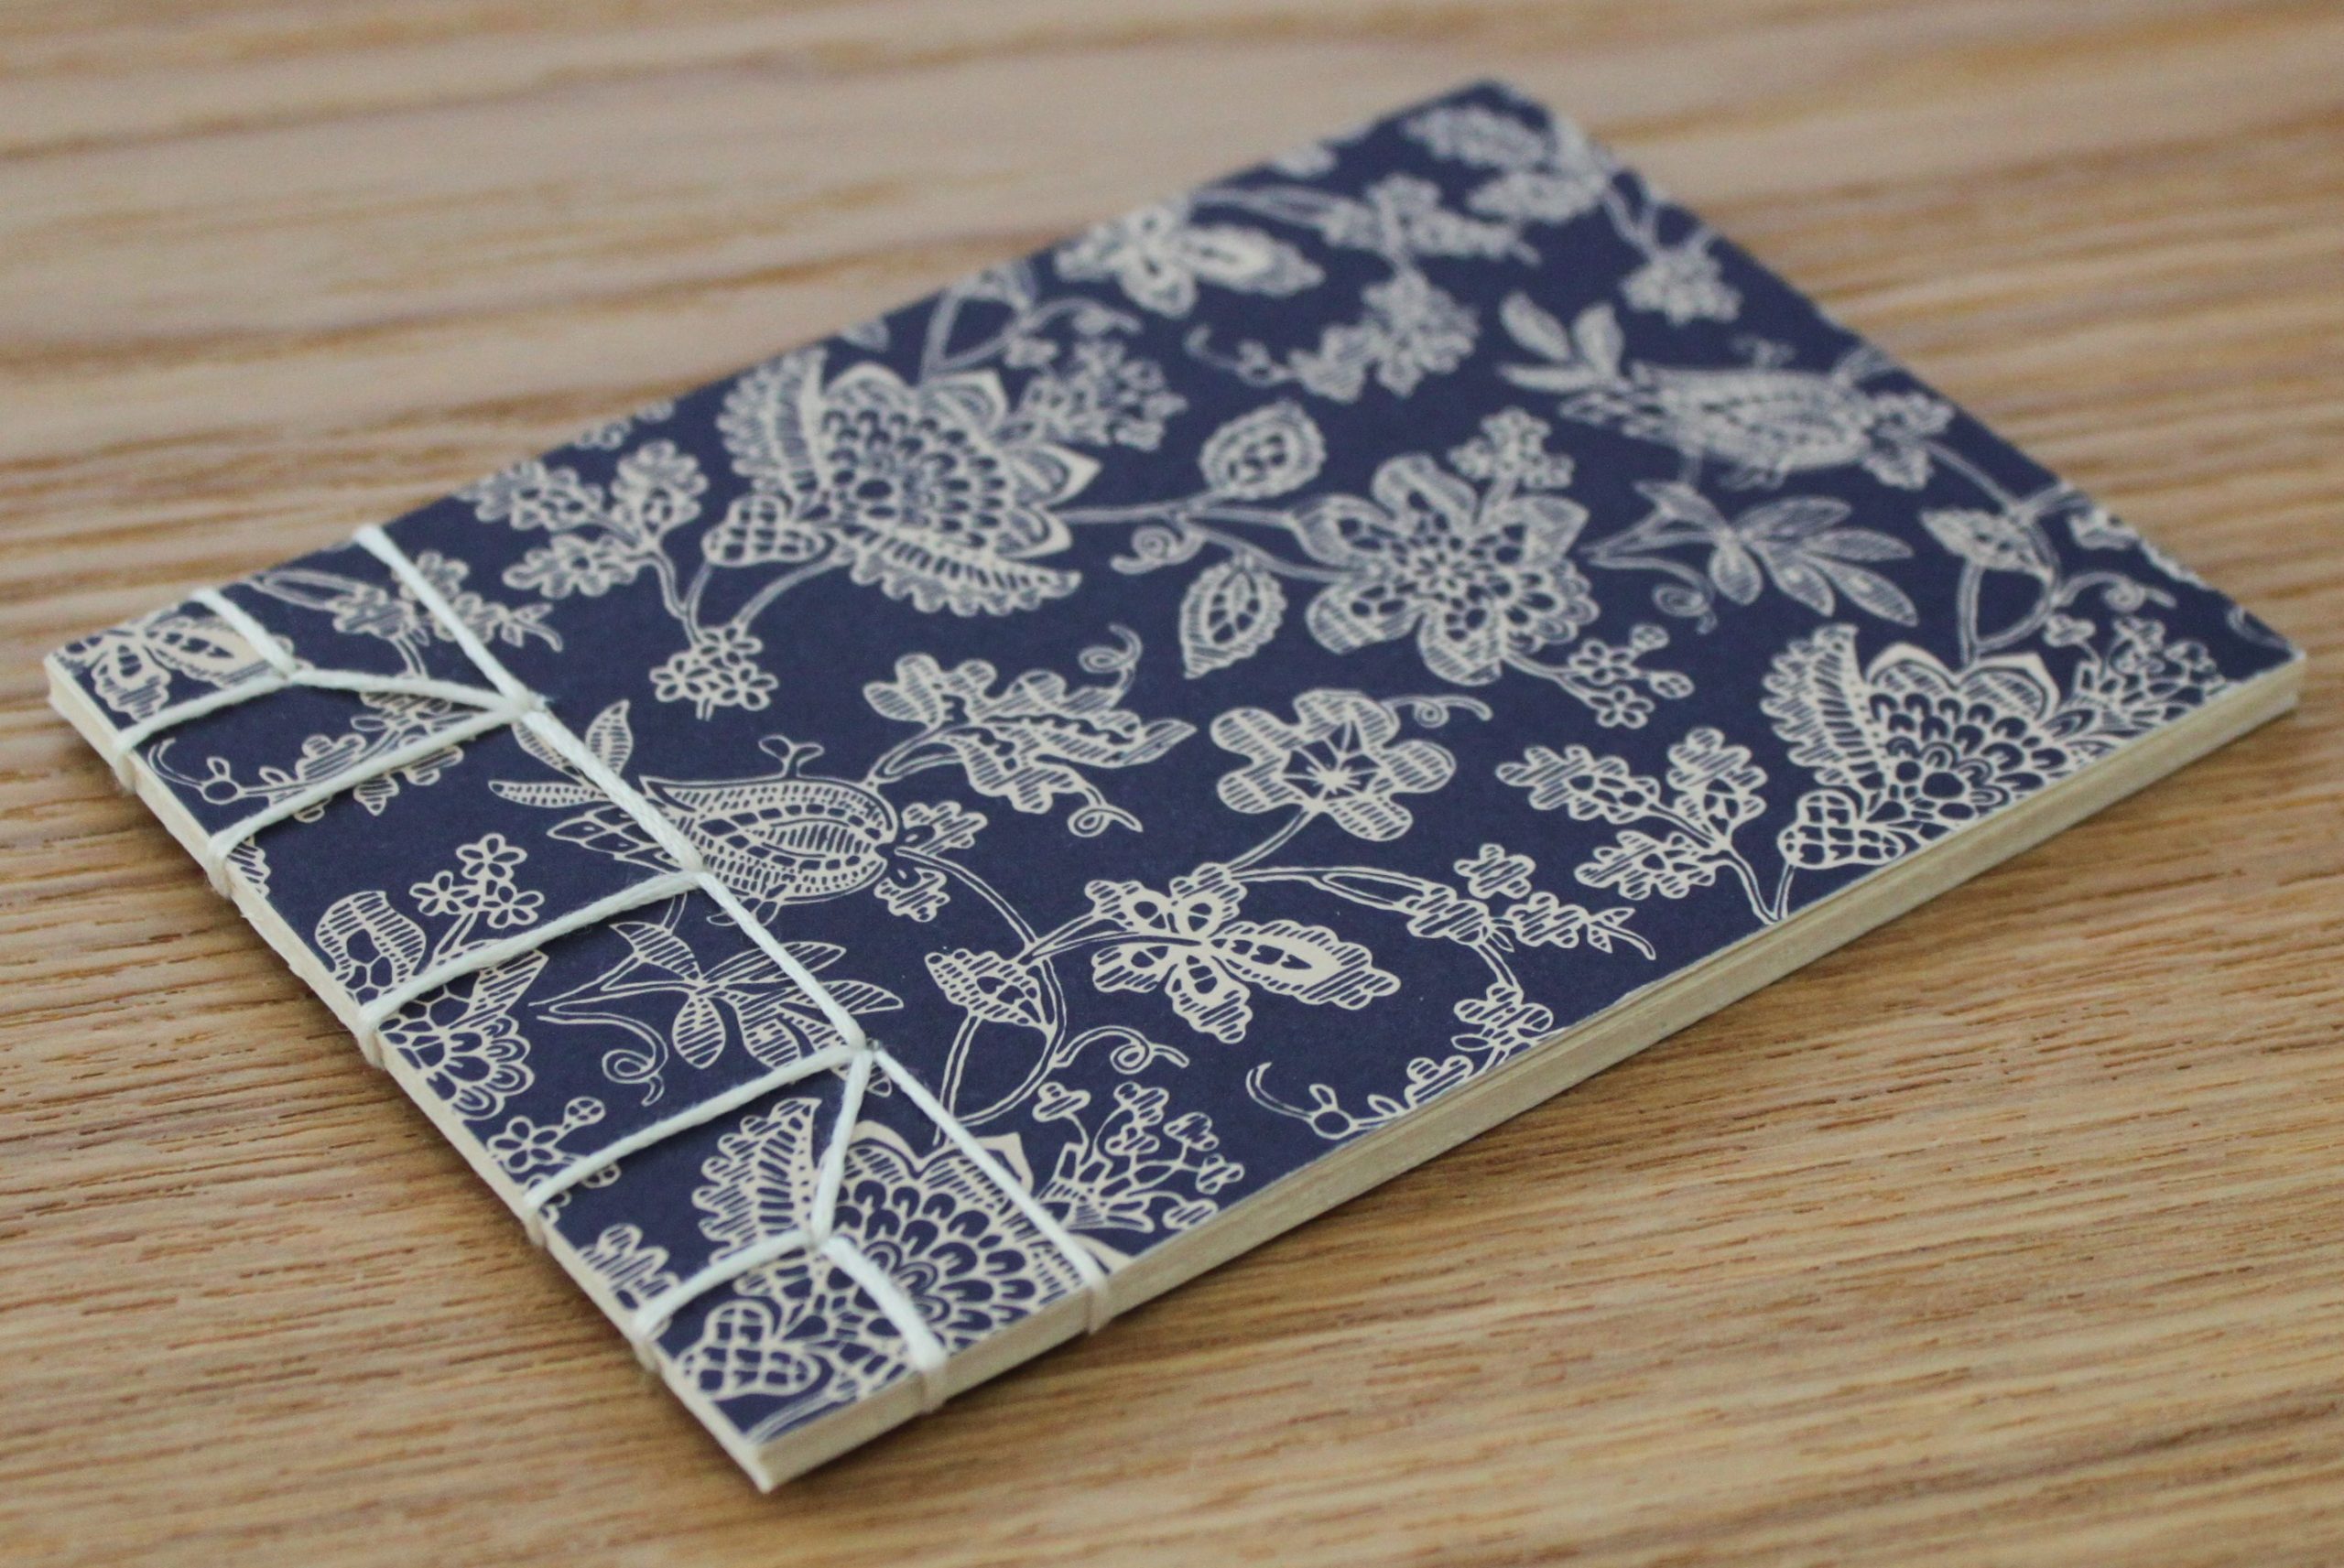
Hopefully, if you’ve managed to follow along, your final work will look something like this:
—
We will be posting instructions on how to do a single-section pamphlet, and a piano-hinge binding – keep your eyes peeled!
We would also love to see you efforts – send them to us on Twitter – @DorsetArchives.