
Whilst the Coronavirus lockdown continues, we have asked our Conservator for some bookbinding activities you can try at home. This is the second of three blogs in which she will show you how to do some book-binding at home…
—
A part of my job that I always look forward to is running bookbinding sessions. Regardless of someone’s skill set, all participants leave the session with their own excellent example of a binding, and there is something very rewarding in creating an object with your own hands. Whilst staying at home, many of us are trying new activities, so we have attached to this blog instructions for the three bindings I usually teach.
For the lessons I run at DHC, we provide participants with the required bookbinding material, but if you don’t have your own book-cloth or mull, which I’m sure many of us don’t, I’ve suggested some alternatives that I hope you might have available around the house.
Have fun!
—
Making a Single Section Pamphlet
What you’ll need
- Six or eight sheets of plain or coloured paper
- Scissors, or scalpel, ruler and cutting mat
- Something to puncture holes in the paper eg an awl or needle
- Thread (3 x the length of the spine) and needle
- A thinly woven material (we used bookbinders mull but some old cotton or linen would do fine)
- Two pieces of stiff card or board (two or three layers of a cereal box glued together would work)
- Thick material for the spine (we used book-cloth, but you could make your own version by brushing glue onto the back of some cloth and allowing it to dry)
- Two sheets of patterned paper to cover the boards
- Glue and brush
- Scrap paper eg old newspaper
Instructions
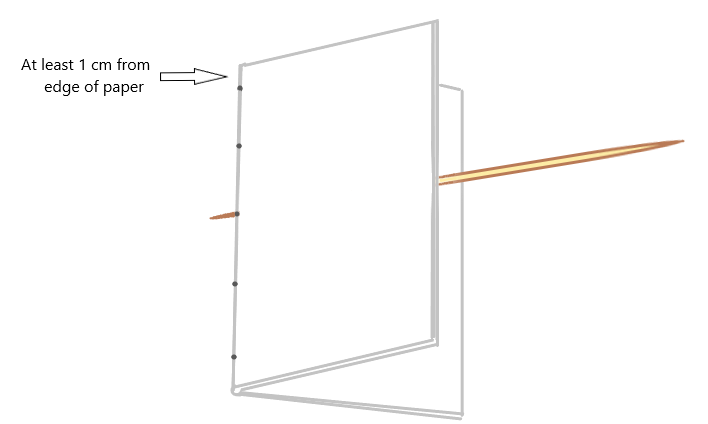
- Cut paper to size (our paper measured 11 x 18cm). Stack the paper together and fold in half. Using an awl or similar, carefully puncture five equally spaced holes along the spine – the outer two holes being at least 1cm from the edge of the paper.
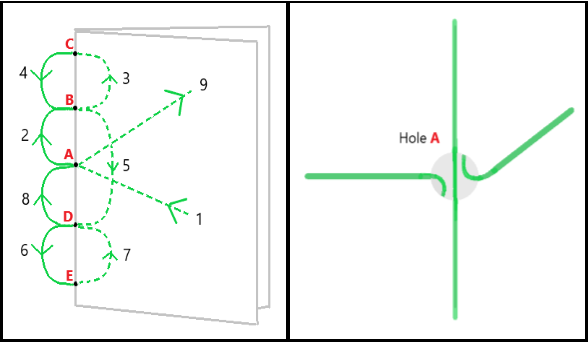
- Thread your needle and sew the paper together using the following method:
- Start inside the folded paper and push your needle through the middle hole (Hole A in the image below). Leave a couple of inches of thread inside the fold – you will need this to tie a knot with at the end
- Push your needle through adjoining hole (B) and pull through the thread so that it is tight against the paper
- Take your needle through the next adjoining hole (C).
- You now want to insert your needle back through hole B. Be careful not to puncture the thread that is already in the hole
- You’re now on the inside of the fold. SKIP OVER hole A and push your needle through hole D
- Come back in through hole E
- Then back through hole D (again be careful not to puncture the thread already in the hole)
- Bring your needle back in hole A. Make sure the ends of the thread are either side of the thread running past the hole (see image below).
- Make sure the thread is not loose by gently pulling each section and tie a knot over the passing thread. Cut off the ends of the threads. This is your completed text-block.
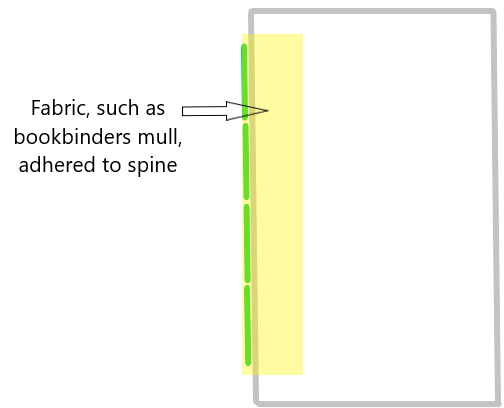
- Cut a piece of the thin cotton or linen approximately 1 cm smaller than the length of your spine by approximately 4cm wide (ours is 10 x 4cm). Apply a thin layer of glue and adhere it to the spine, making sure it is properly stuck to the paper.
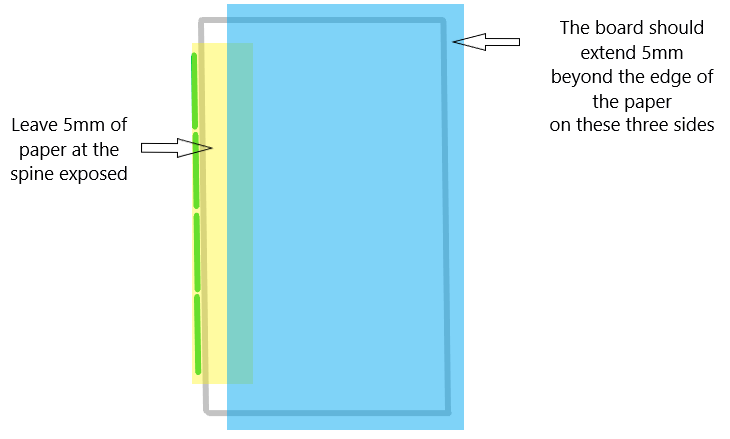
- Cut boards the same width as the paper and 1cm longer (ours are 12 x 9cm). Apply a thin layer of glue to the first board and adhere to the paper. The board should be positioned 5mm from the edge of the spine, so that the boards extends beyond the paper by 5mm on the head, tail and fore-edge.
- Adhere the second board on, making sure it lines up with the first board. Allow these to dry.
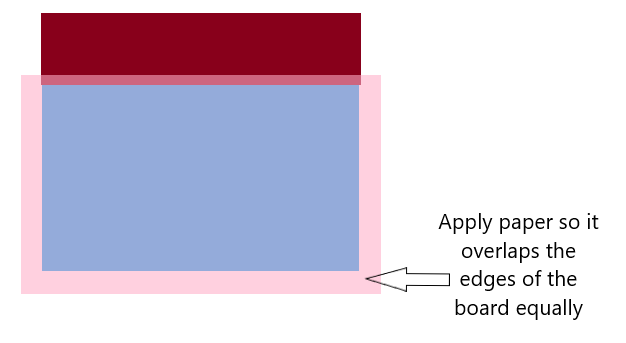
- Cut a piece of book-cloth or similar so that when folded in half it will wrap around the spine and cover approximately a fifth of the width of the board and is at least 3cm longer (ours is 15 x 5cm). Fold the cloth lengthwise to form a crease – this will help you to attach it to each side of the book equally.
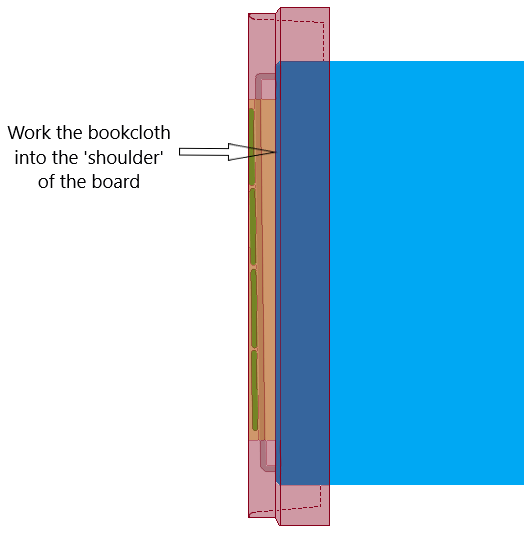
- Apply a thin layer of glue and adhere it to the spine – spend time working it into the creases between the paper and the boards and make sure it’s well adhered.
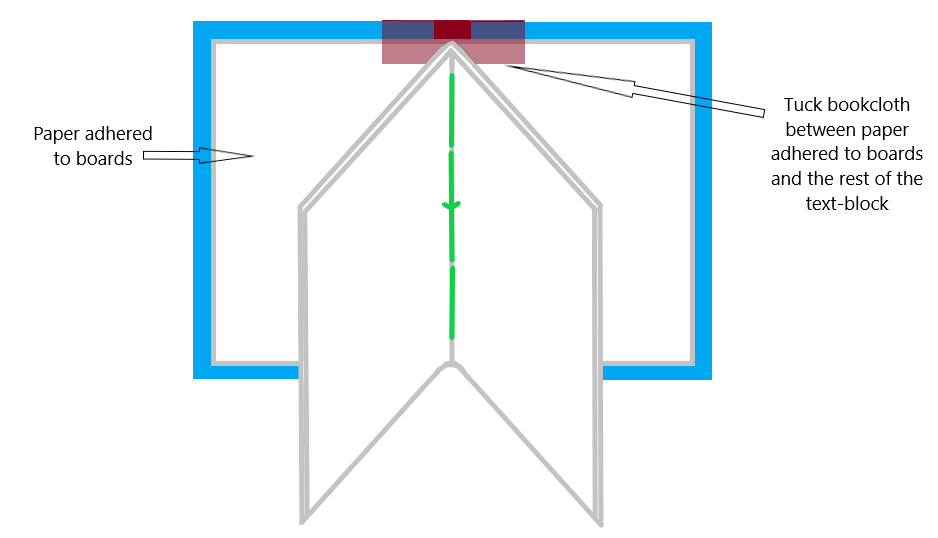
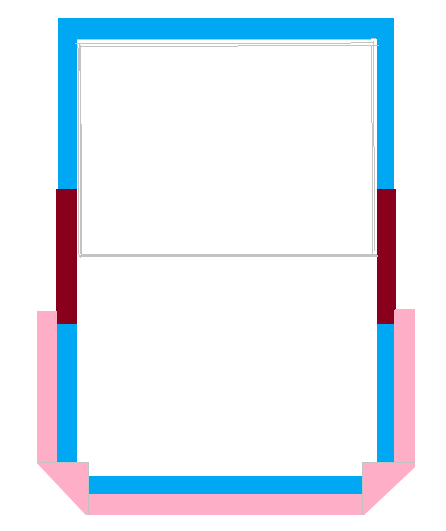
- Once the book-cloth is fully adhered to the spine, the extra cloth at the top and bottom needs to be tucked in. Open the boards and apply some more glue to one of the book-cloth ends. Carefully fold the cloth over and tuck in between the outer page (which is adhered to the boards) and the rest of the text-block. This is a bit fiddly but preserve, making sure the book-cloth is push in as far as it can go and is tight against the boards, with as few creases as possible. Do the same at the other end of the spine.
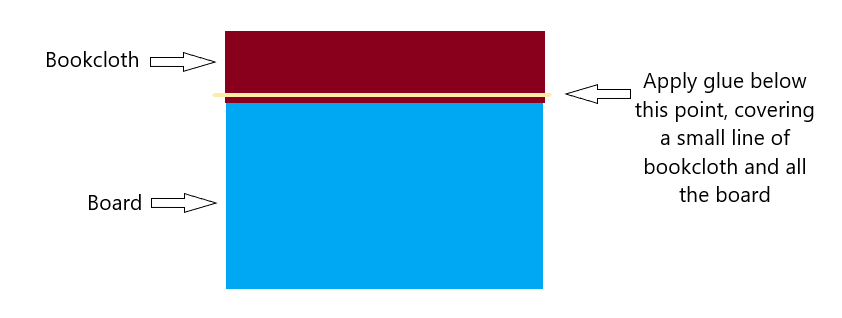
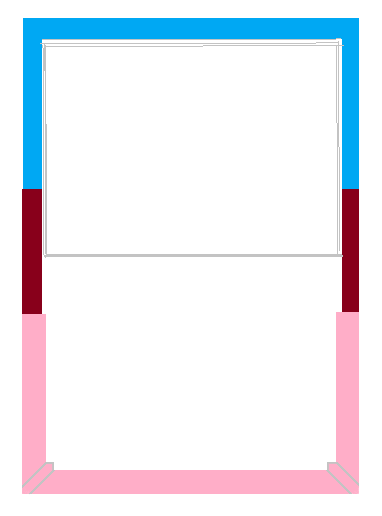
- Cut to size the two pieces of patterned paper that you have chosen for the cover. They need to be at least 4cm longer and roughly the same width as your boards (ours are 16 x 9cm). Carefully apply a thin layer of glue to the outside of the first board, just overlapping the edge of the book-cloth and place on the paper so that there is the same amount of overhang on all three sides of the board. Make sure it is well adhered.
- Open the book to turn in the edges. Start with the corners of the paper. Apply a little glue to the corners and turn in at a 90O Work the paper into the creases but be careful not to tear it.
- Now apply a thin layer of glue to the edges and turn them in, making sure they’re flush against the board.
- Apply the cover paper to the other board following the same steps.
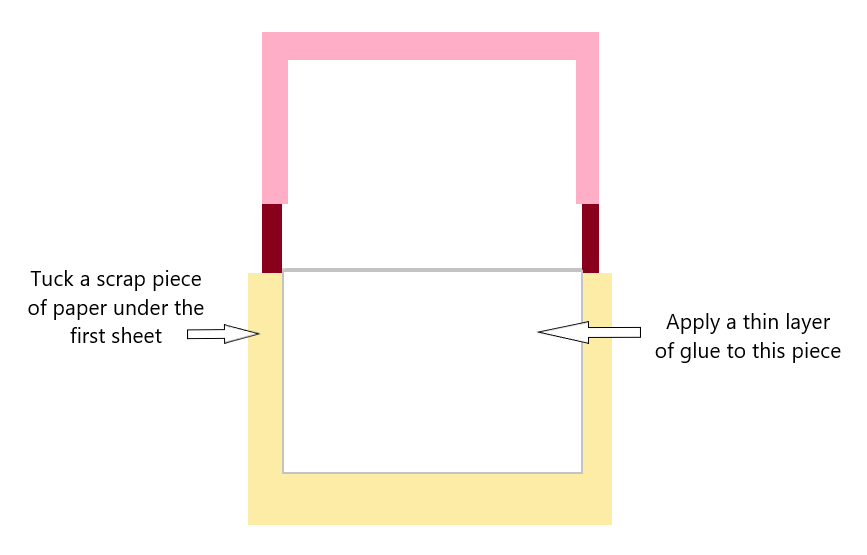
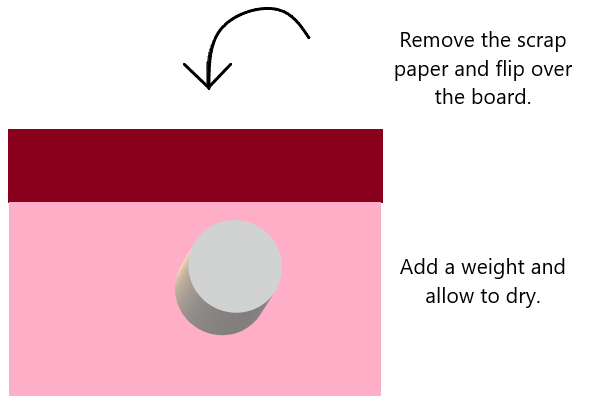
- The finishing touch is to adhere the ‘endpapers’ which will hide the rough edges of the cover paper and book cloth. Take a piece of scrap paper and tuck it under the first leaf. Brush on a thin layer of glue (the scrap paper will protect the rest of the text-block from any excess glue). The paper will probably curl at this point so be careful to keep it as flat as you can. Remove the scrap paper and close the book. Put a light weight onto the book and make sure it’s dry before sticking down the other endpaper.
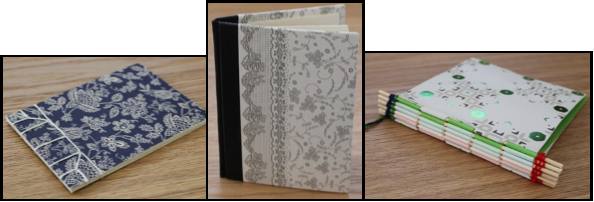
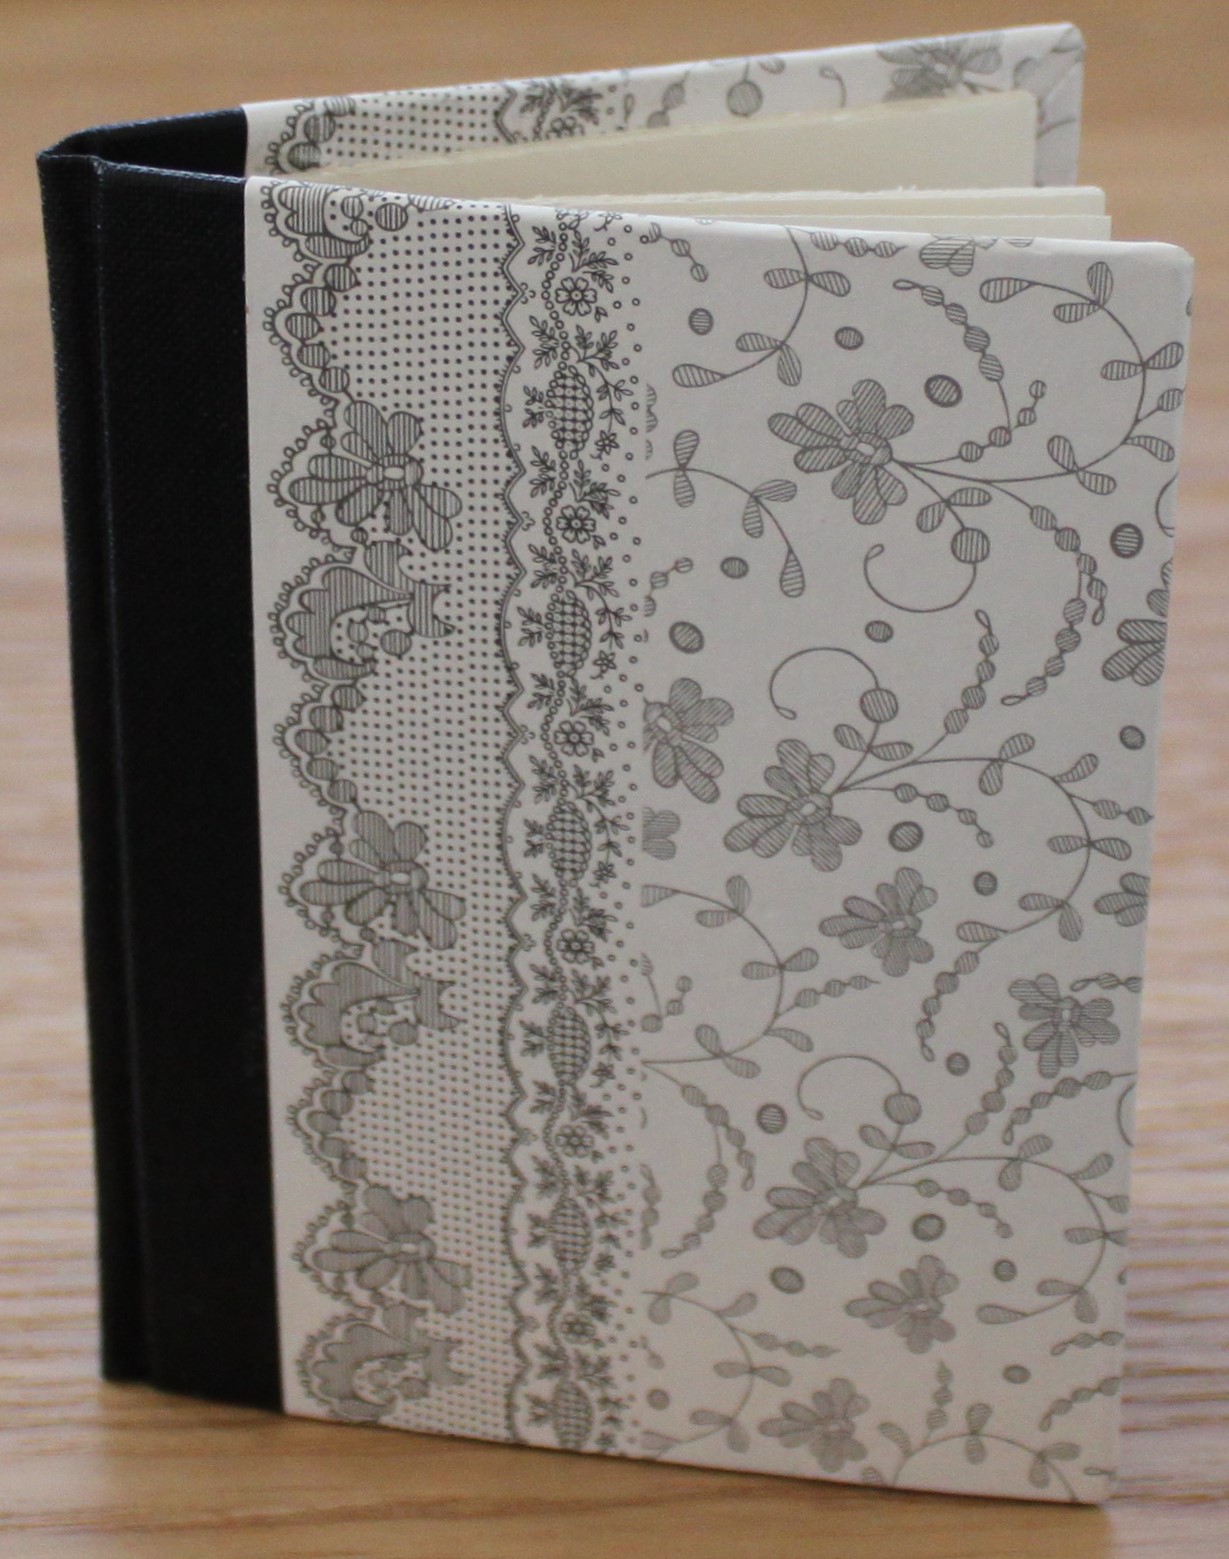
Hopefully, if you’ve managed to follow along, you should get something which looks like this:
—
We would love to see you efforts – send them to us on Twitter – @DorsetArchives.