
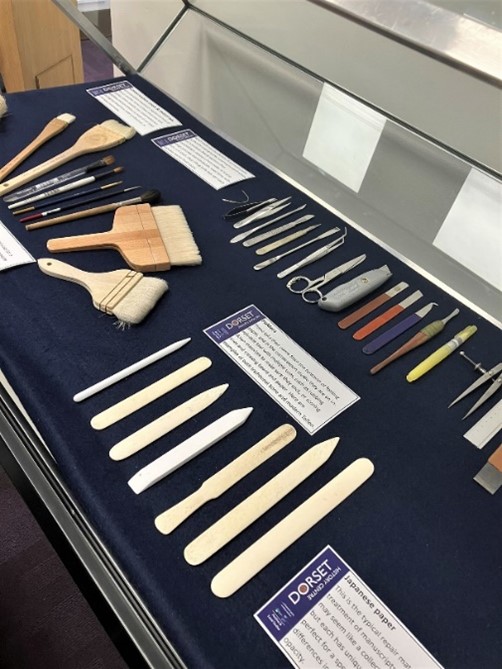
If you have visited the Dorset History Centre during June and spent time in the reception area you may have seen the display showcasing some of the many tools, and a few commonly used materials, that can be found in the conservation studio. Our Conservator explains more…
—
Some of the tools may look familiar, others not so much. There is a curved needle perfect for sewing books; a porcupine quill useful for holding down tiny flakes of pigment after consolidation; tweezers that enable me to grip things precisely and manipulate small items with care; or a small, sharp lifting knife that can easily separate leather from board.
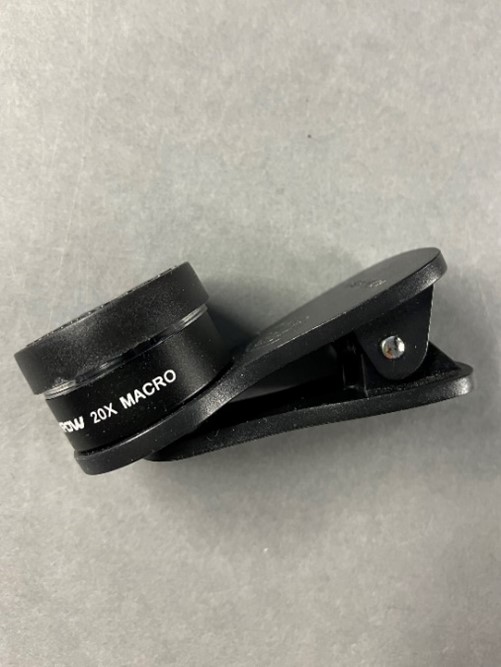
However, I’ve chosen to highlight a slightly different tool that I’ve been using recently. It’s a small macro lens that clips on to your phone over the camera, enabling you to not only use your phone as a microscope, but to take instant photos of the enlarged image. It’s proven to be very convenient as it can be used in-situ without the difficulty of trying to position a historic document under a traditional microscope stand, or having to connect to a computer as required with a USB microscope. It’s small, lightweight, easily transportable, cheap and requires no instructions!
But what am I typically using a microscope like this for? I’ll explain a few examples.
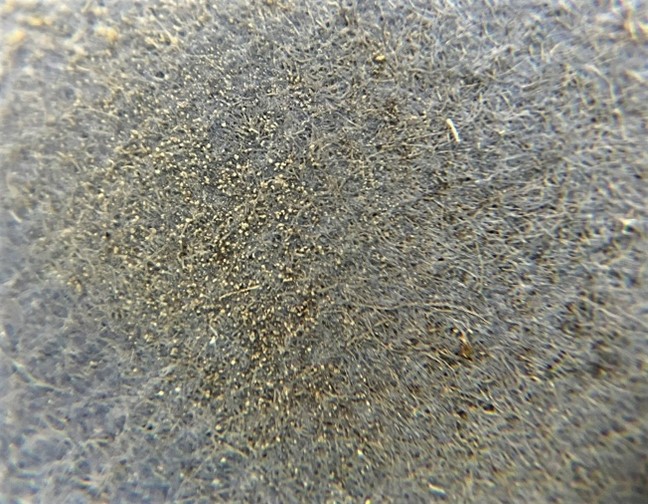
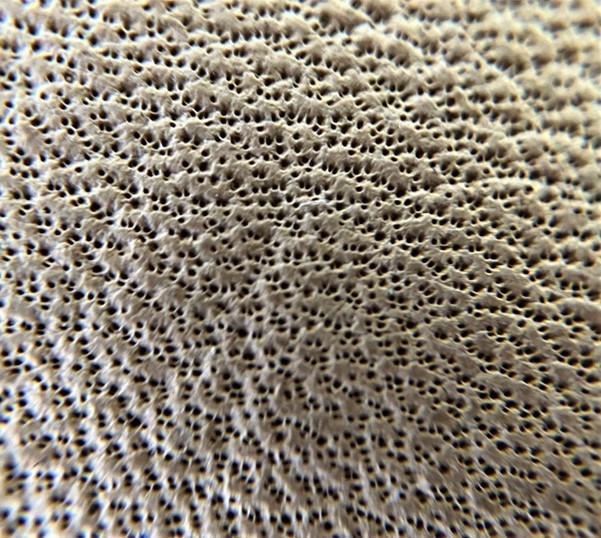
- Exploring the paper surface – a document may appear to be in a good, stable condition but once under the microscope the paper substrate reveals its deteriorating state. The document in the following photograph has already undergone cleaning due to historic mould damage, but by looking closer we can see that tiny particles still cling on to the paper fibres and therefore further cleaning will be necessary.
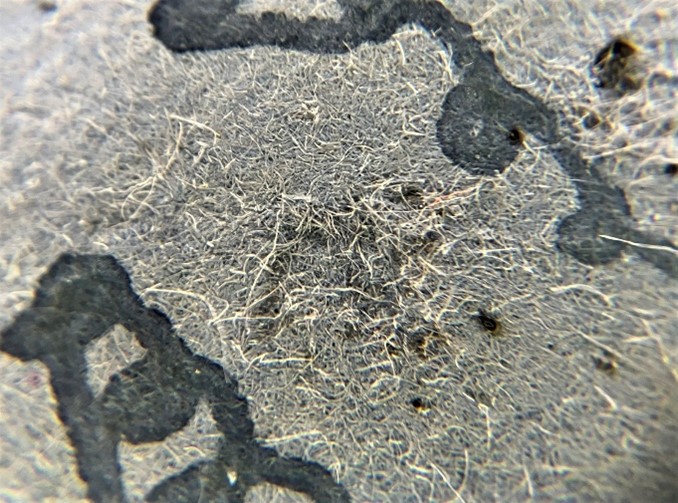
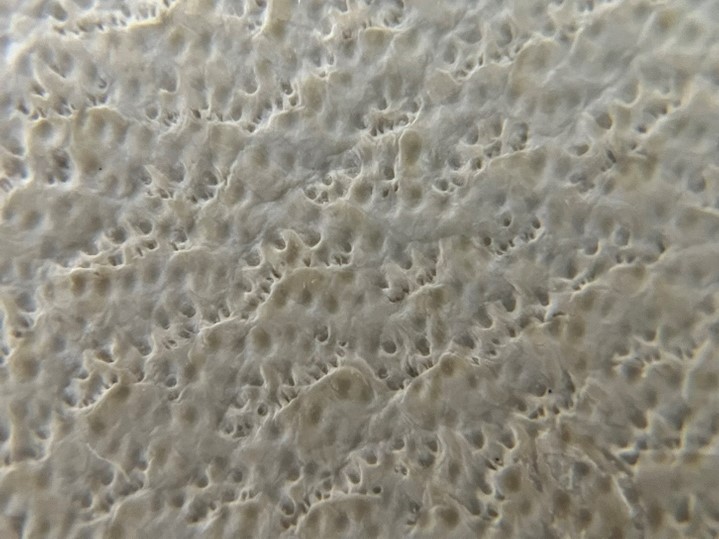
The image in the next photograph is from a document that was going to be surface cleaned, it shows damage to the paper surface barely visible to the naked eye. However gentle we are during the cleaning process it always carries the risk of abrasion and therefore knowing that the paper surface is already weakened means that cleaning is kept to a minimum and carefully monitored throughout. It also indicates that a consolidation treatment could be beneficial to provide strength and improve long-term stability.
—
2. Identifying prints – knowing what type of print you are treating can be incredibly important, it can be used as an aid to help date the work, or ascertain whether it is an original etching, for example, or a later photomechanical or digital printed copy. Print identification may also give an indication of the ink used. Different inks can react in very different ways depending on their material composition, for instance they may respond poorly to certain solvents, or they could be water soluble and therefore water-based treatments may need to be avoided.

The above image shows the rosette pattern of dots distinguishes this printing process as offset lithography, a planographic photomechanical printing technique that combines lithography, photography, and offset printing.
The build up of ink along the edges of the print reveal this is a relief printing process, such as woodblock, or wood engraving as shown in the image above. The force of the press pushes the ink outwards causing it to pool at the edges of the printed area.
—
3. Identifying leather species – distinguishing which animal was used to make the leather on a bookbinding enables like-for-like conservation treatment. It may also provide insight into place of origin or the historic availability of certain skins. The image below shows an even distribution of hair follicles, which identifies this leather as from a cow.
The next image shows us two rows of follicles that are visible, indicative of a two-coated fleece. This tells us it is a goat skin.
—
4. Getting up close with inks – with the naked eye the sand crystals resting on the text in the next image look like bits of glitter. But what would glitter be doing on this manuscript?
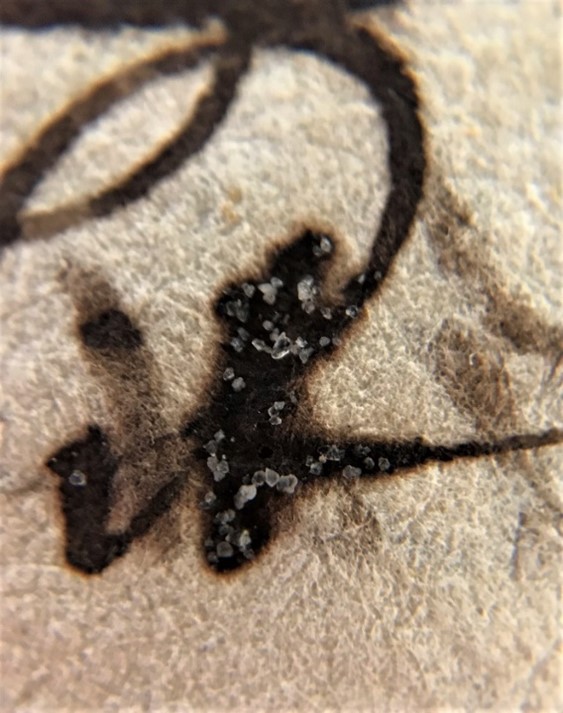
With the macro lens you can clearly see they are actually crystals. These crystals are either caused by an excess of inorganic salts from the iron-gall ink itself, or remnants of blotting sand the scribed used to speed up the drying process during the writing of the manuscript. Although easily removed, whether by accident or deliberately, it’s important not to brush these small crystals away during use or cleaning as they provide fascinating evidence of materiality.
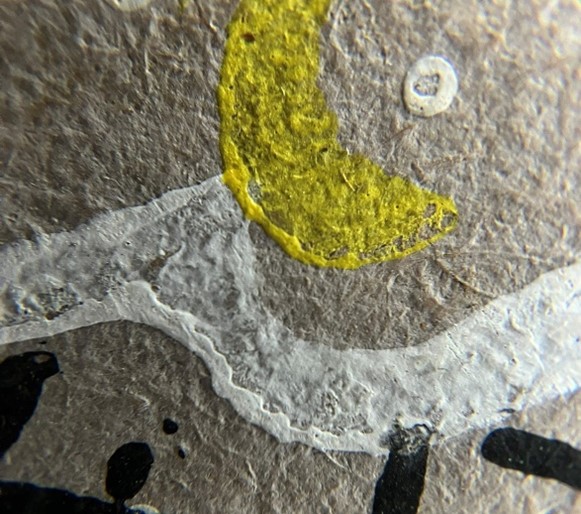
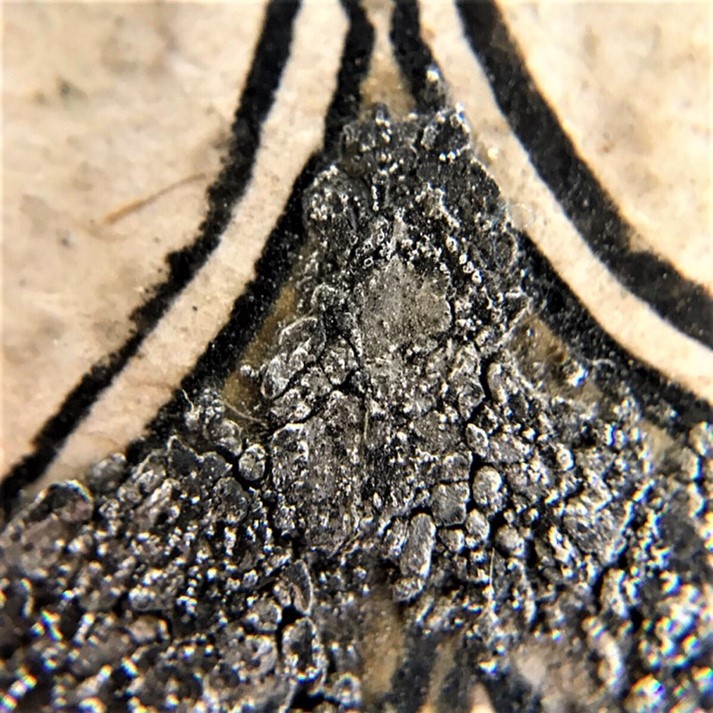
The enlarged image of decorative lettering on the right shows the crumbling nature of the silvery pigment, highlighting its instability and therefore the need for careful handling, or possibly remedial conservation treatment.
As you can see, the macro-lens is a very handy addition to my tool kit, and I hope this has given a small insight into the macro world of conservation!