
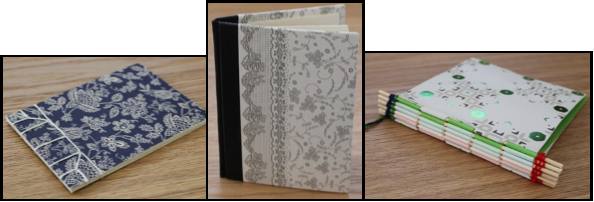
Whilst the Coronavirus lockdown continues, we have asked our Conservator for some bookbinding activities you can try at home. This is the third of three blogs in which she will show you how to do some book-binding at home…
—
A part of my job that I always look forward to is running bookbinding sessions. Regardless of someone’s skill set, all participants leave the session with their own excellent example of a binding, and there is something very rewarding in creating an object with your own hands. Whilst staying at home, many of us are trying new activities, so we have attached to this blog instructions for the three bindings I usually teach.
For the lessons I run at DHC, we provide participants with the required bookbinding material, but if you don’t have your own book-cloth or mull, which I’m sure many of us don’t, I’ve suggested some alternatives that I hope you might have available around the house.
Have fun!
—
Making a Piano Hinge Binding
What you’ll need
- At least five sheets of paper for the book and two pieces of thicker paper or card for the cover – you can use different colours to make patterns or a rainbow effect on the spine
- Wooden skewers (or you can use anything of a similar shape such as pencils or twigs) – one fewer than the number of sheets of paper you’re using
- Scissors, or scalpel, ruler and cutting mat
- Ruler and pencil
- Glue and brush
- Coloured threads and beads
Instructions
- Cut every piece of paper (including the cover) the same size. An extra 1cm is required for the spine if you’re using standard wooden skewers. If you are using thicker pencils or twigs you will need to allow more paper to wrap around them (we made our binding 12 x 12cm, so the paper measured 12 x 25cm).

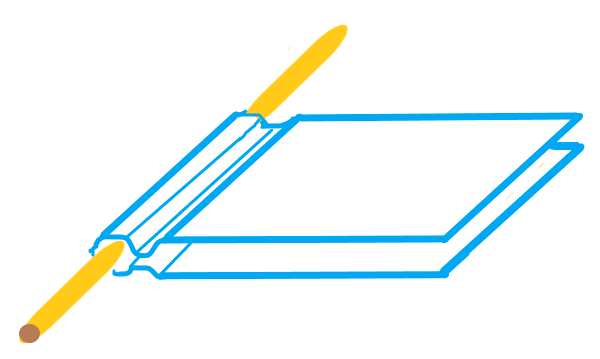
- Take your first sheet of paper and fold it in half by wrapping it around a skewer. Use your finger to press the paper into the skewer to create an obvious crease. You will need to do this gently so as not to tear the paper. Then turn the paper and skewer over and crease the other side. Repeat with all your pieces of paper, including the cover paper.
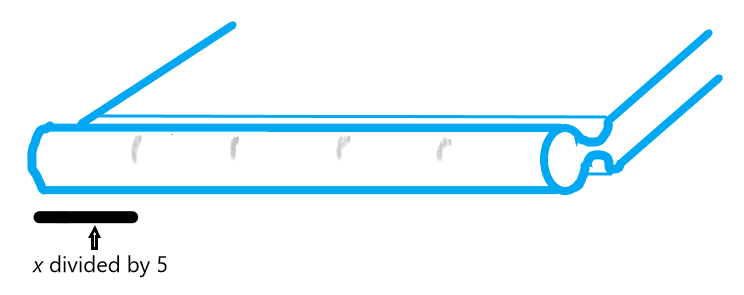
- Draw on four equally spaced marks along the fold by dividing the width of your paper (x) by 5. Try not to press down on the crease – you want it to remain rounded rather than flattened.
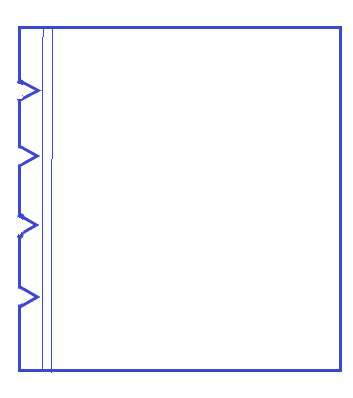
- Cut small triangles out at each mark. These triangles should go up to the crease but not beyond it. If the triangles are too large your skewers will fall out. Continue with all your sheets – ensure all the triangles are at the same place on all your pieces of paper.
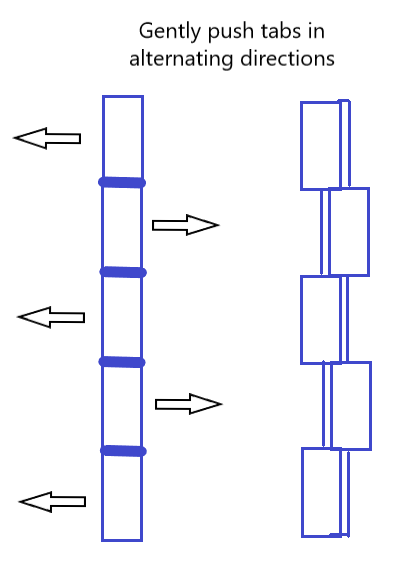
- Once you’ve cut all your pieces of paper, gently press all the odd tabs in one direction, and all the even tabs in the other.
- Put the cover paper to one side for later.
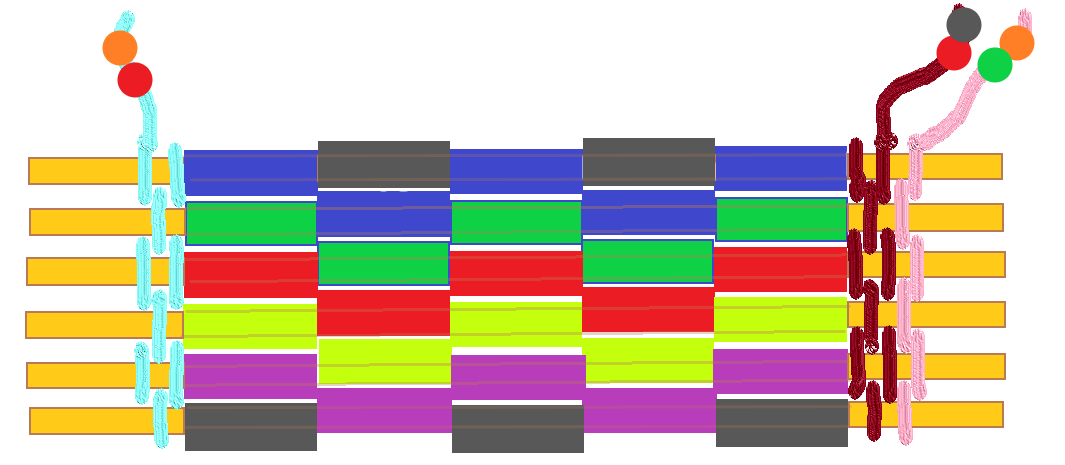
- Take the first two pieces of paper and place them together, so that their tabs face in the same directions. Use a skewer to thread through the tabs, alternating the pieces of paper. The even tabs of one piece and the odd tabs of the other should be on the skewer.

- Continue this with all the folded paper.

- Then make the covers.
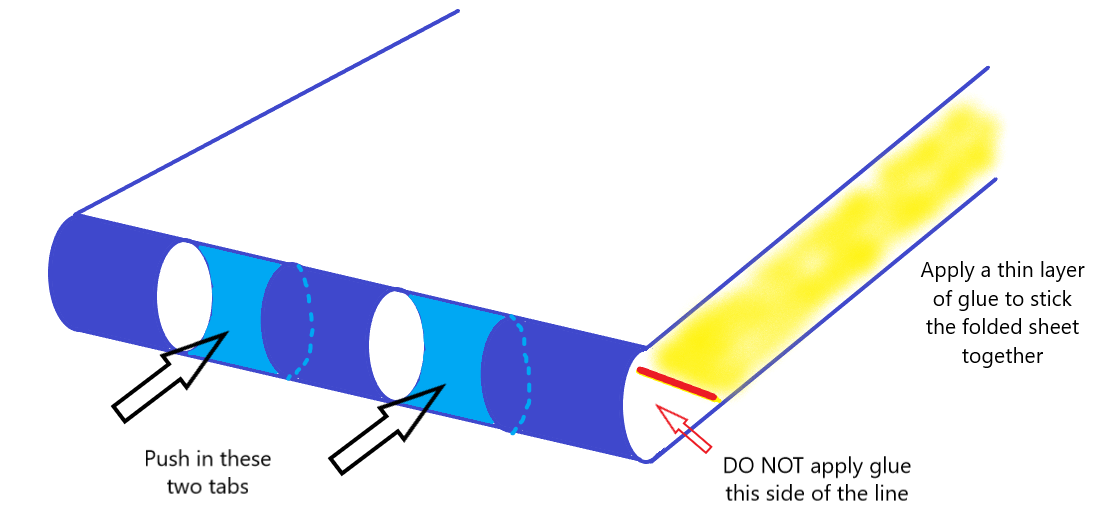
- Take one of the cover pieces of paper and gently push the two even tabs into the inside of the folded paper. Apply glue to the inside of the fold to adhere the folded sheet together, trapping the two tabs. Do not glue all the way into the fold. Take the other piece and push in the three odd tabs and glue the folded sheet together. Allow the glue to dry.
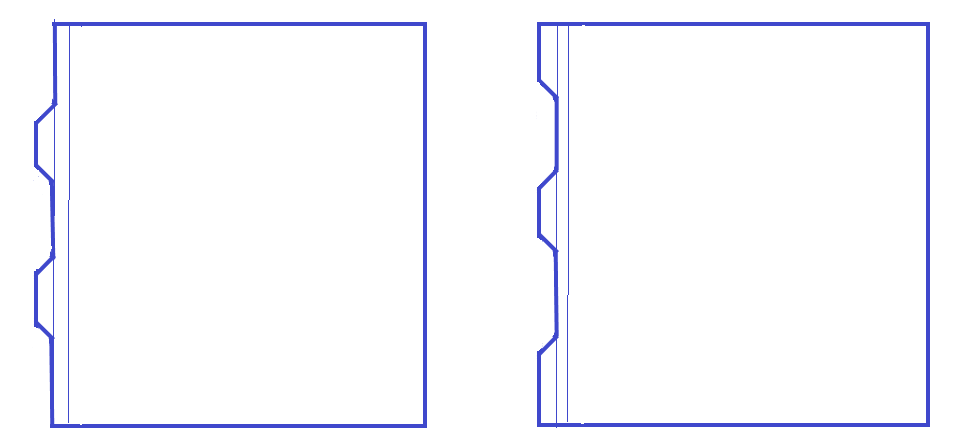
- The two cover pieces should look like this:

- Use two skewers to attach the front and back covers by threading them into the remaining gaps.
- Knot a length of thread to one of the outer skewers and weave between the skewers at each end of the paper. This secures the paper and stops the skewers falling out. Beads can be added to the thread for extra decoration.
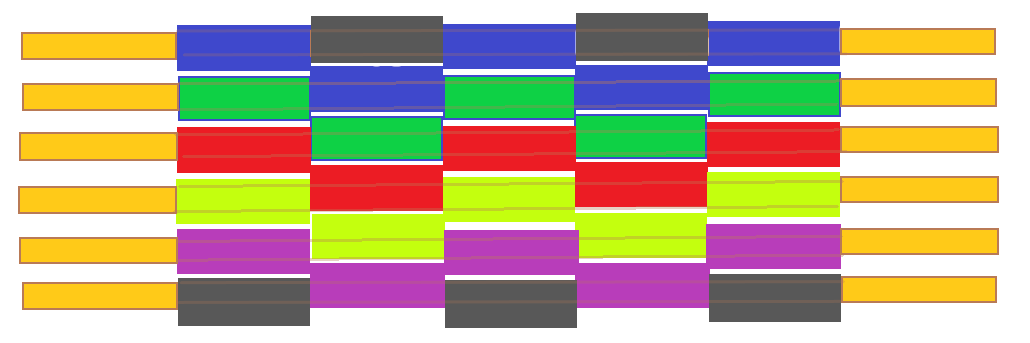
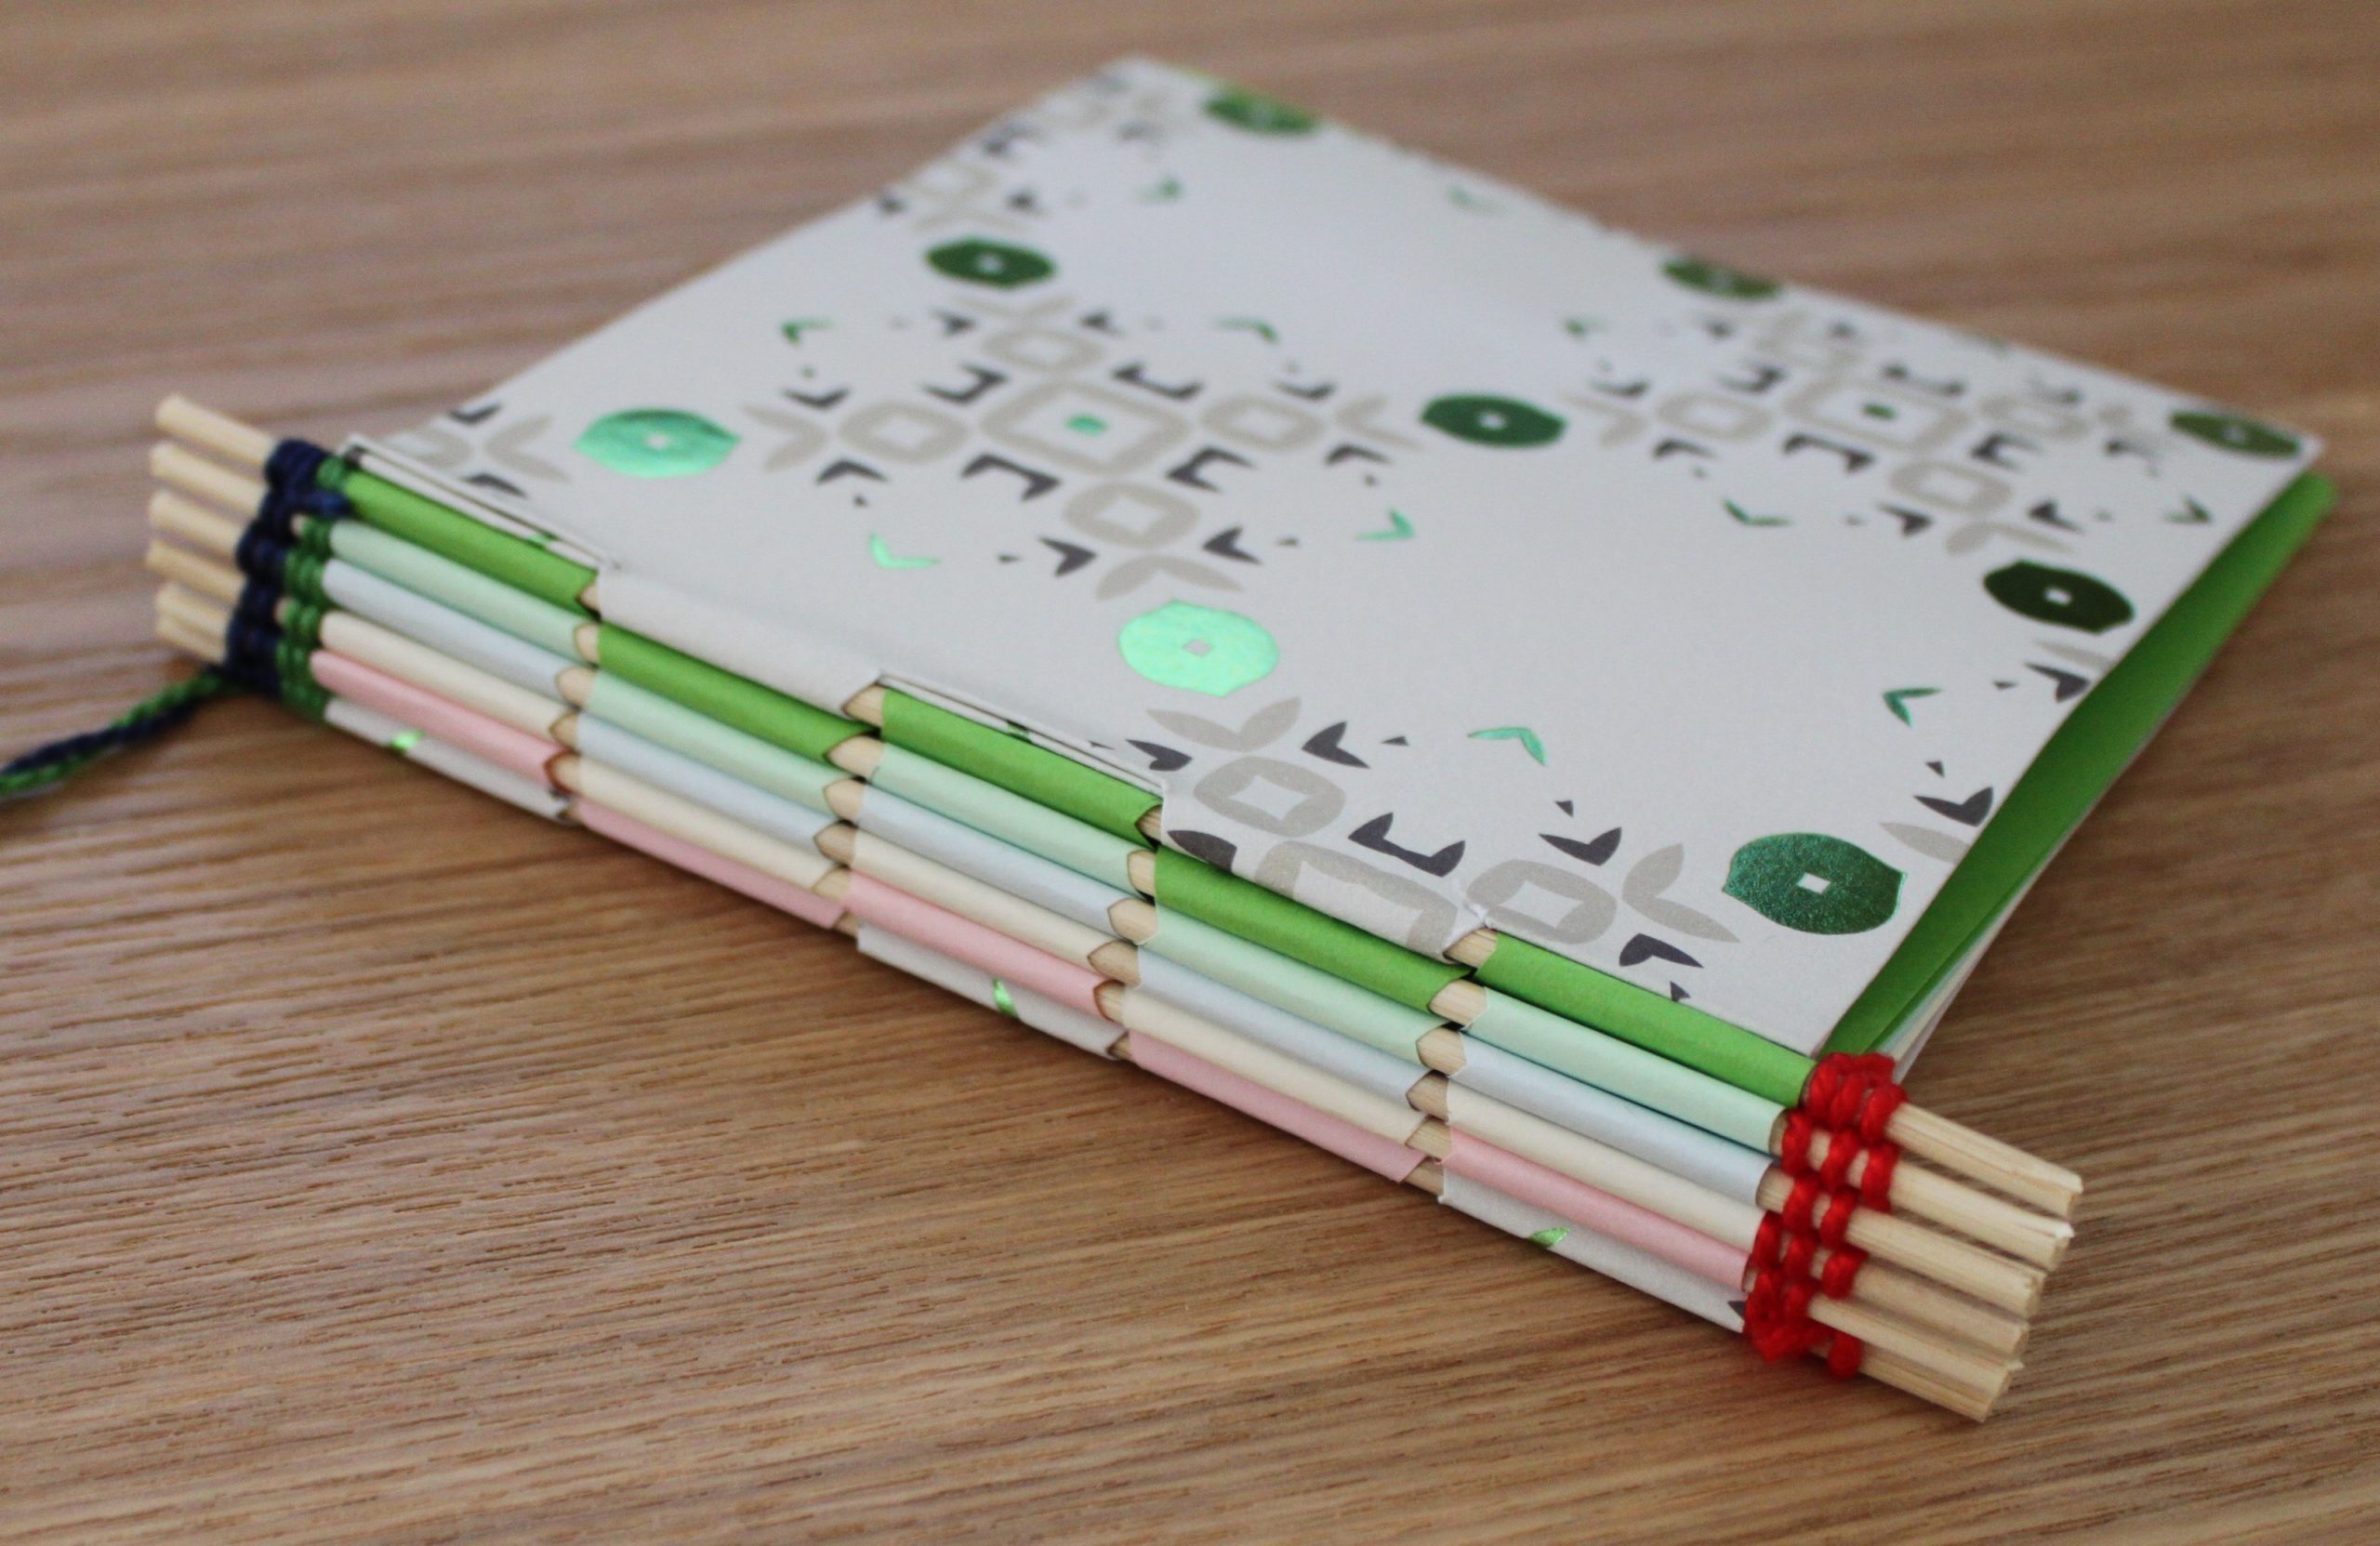
Hopefully, if you’ve managed to follow along, your binding should look something like this:
—
We would love to see you efforts – send them to us on Twitter – @DorsetArchives.
This is amazing! I have tried my hand at book-binding, but only very basic types. All my books are in storage, so I’m a little frustrated! What I was keen to find out is that you run book-binding classes/courses. Could you please let me have details. I would love to do a course or workshop to supplement my own self-taught experience so far.
Hi Anna! Thanks for your comment. We occasionally offer a class to a specific group as part of a wider visit to DHC, but we don’t offer courses unfortunately. We will pass your comment onto our Conservator and see if there is any scope to do something more regular!
I really enjoy your blog and read it regularly. Re: George III’s visit to Devonshire – that delightful National Trust Property, Cothele, is, of course on the west bank of the Tamar, in Cornwall. I’m a bit mystified as to how the guide book’s artist managed to depict a stately interior. The National Trust has described the rooms as “small and mostly dark, reached by flights of worn stone steps and through massive wooden doors in granite archways” and that, of course, is its appeal to modern-day visitors. Interestingly the National Trust has speculated that the gothic-styled triangular prospect tower, was built to celebrate the King’s visit.
Hi Jean! Thank-you for your comment, and noticing our mistake! We will correct it immediately! When we re-open you are most welcome to come and consult Broadley’s work and read Arundell’s thoughts about the building!